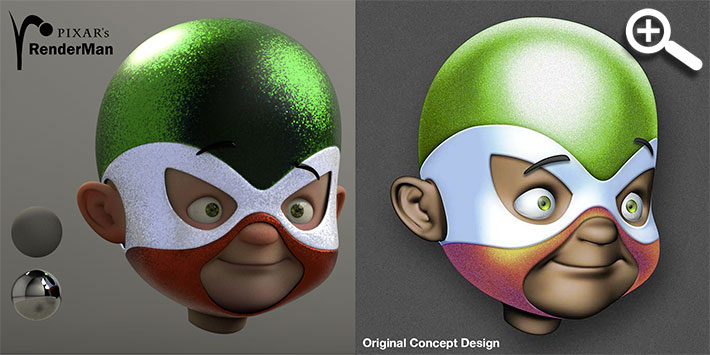
...Unique Creative Styles and Content For Animation
My First Production CGI Project... Back in 2001!
Thursday, May 28, 2015 Filed in: Education
So back in 2001, I worked on a Pilot for Nickelodeon called “Constant Payne.” It was n “experience,” with the most interesting crew I’ve ever worked with.
The Pilot never made it into a series, which was sad because all of us poured our hearts into the production. But the reason why I want to show you this is so that you could have options when it comes to using a 3-D program like Maya as a “tool,” just like Photoshop or a blue-pencil, for any 2-D productions out there!
The Pilot never made it into a series, which was sad because all of us poured our hearts into the production. But the reason why I want to show you this is so that you could have options when it comes to using a 3-D program like Maya as a “tool,” just like Photoshop or a blue-pencil, for any 2-D productions out there!

(Click on image to enlarge!)
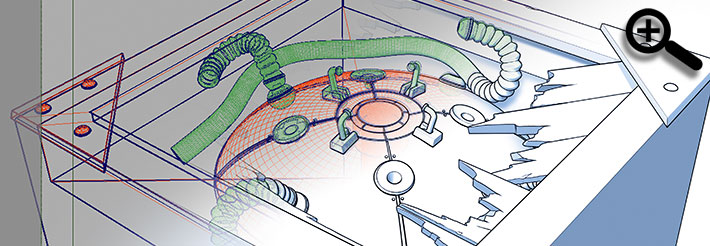
Maya has a Toon tab built in and its quite amazing, simple and fast. Give it a try to see what you can get out of it! ITS FREE!
Here’s the final version:
(Click on image to enlarge!)
Some of the distress was hand-drawned to keep with the style of the Pilot.
Cheers
Purple Platapus: FDM Materials And Their Uses Seminar
Wednesday, May 27, 2015 Filed in: Tools for Artists
Just finished a seminar over at Purple Platypus called “FDM Material Selection.” The seminar covered all the FDM materials that their Stratasys machines handle. Great information and samples!

(Click on image for link)
Cheers!
Hand-Painted Specular Maps Vs. "Attribute" Generated
Saturday, May 23, 2015 Filed in: Tools for Artists
In a previous post (5/17/15,) I showed what the specularity of the Lil Fee looked like when generated by an “attribute” - having the specularity’s Color attribute control a “general” amount across the texture…
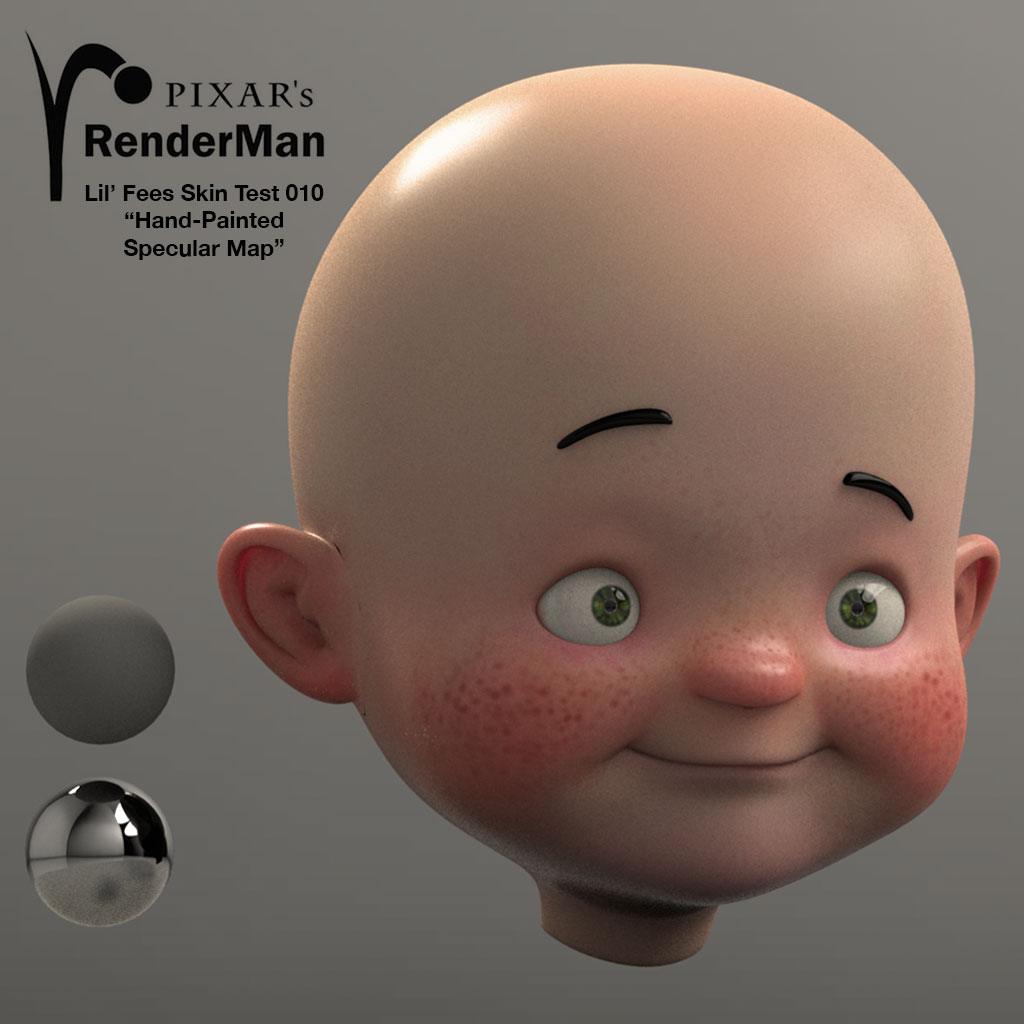
Here’s a comparison between a custom, hand-painted map and the one generated by an attribute. The first image is the hand-painted Specular Map:
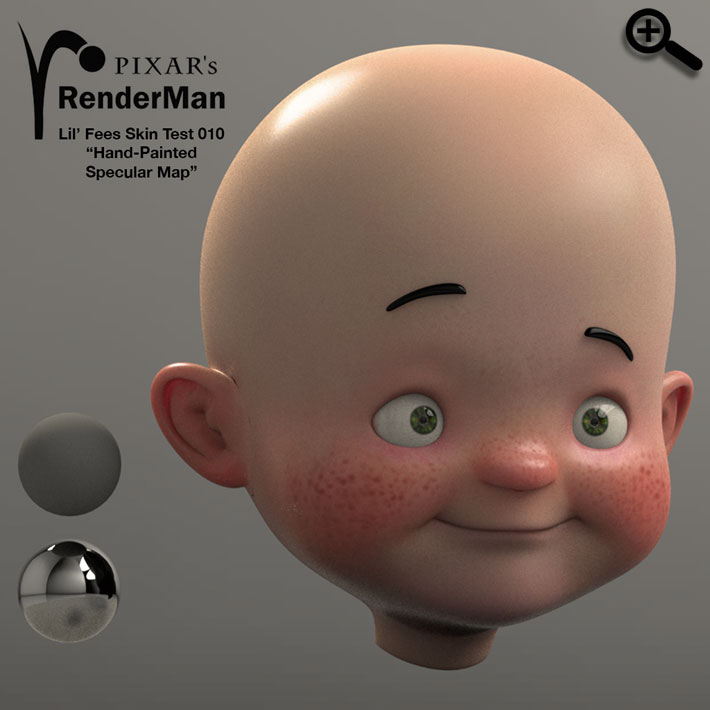
Notice how the specular is more intense on certain areas: the nose, cheeks and chin in comparison to the rest of the head, plus, I can make the freckles dull in specularity and I can avoid any “blooming” as in the top of the head…
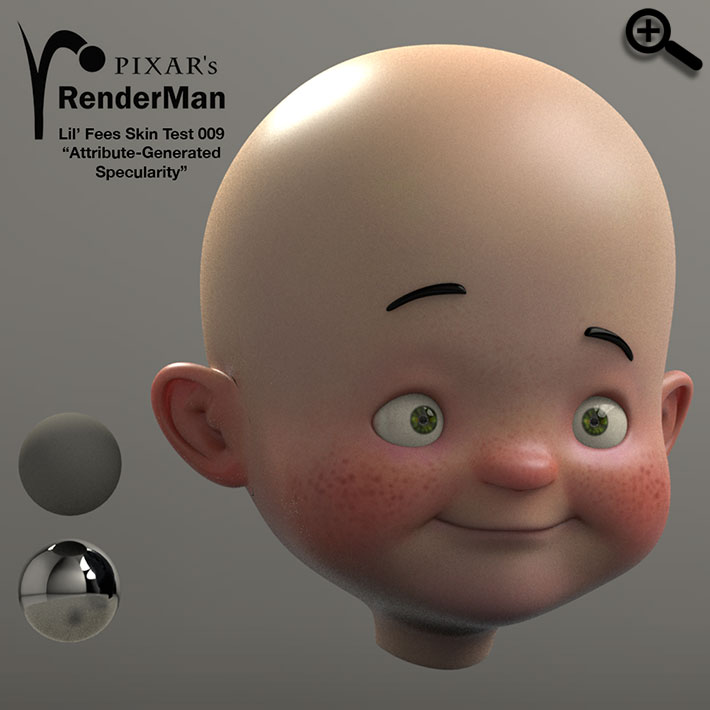
And the image above is the one where the specular is generated by the Specular’s Color swatch. This creates a “constant” specular across the head, so when you get a good result, say, for the nose, the specular gets “blown” on the top of the head…
Cheers!
Here’s a comparison between a custom, hand-painted map and the one generated by an attribute. The first image is the hand-painted Specular Map:
Notice how the specular is more intense on certain areas: the nose, cheeks and chin in comparison to the rest of the head, plus, I can make the freckles dull in specularity and I can avoid any “blooming” as in the top of the head…

And the image above is the one where the specular is generated by the Specular’s Color swatch. This creates a “constant” specular across the head, so when you get a good result, say, for the nose, the specular gets “blown” on the top of the head…
Cheers!
Specular Tests Using RenderMan
Sunday, May 17, 2015 Filed in: Tools for Artists
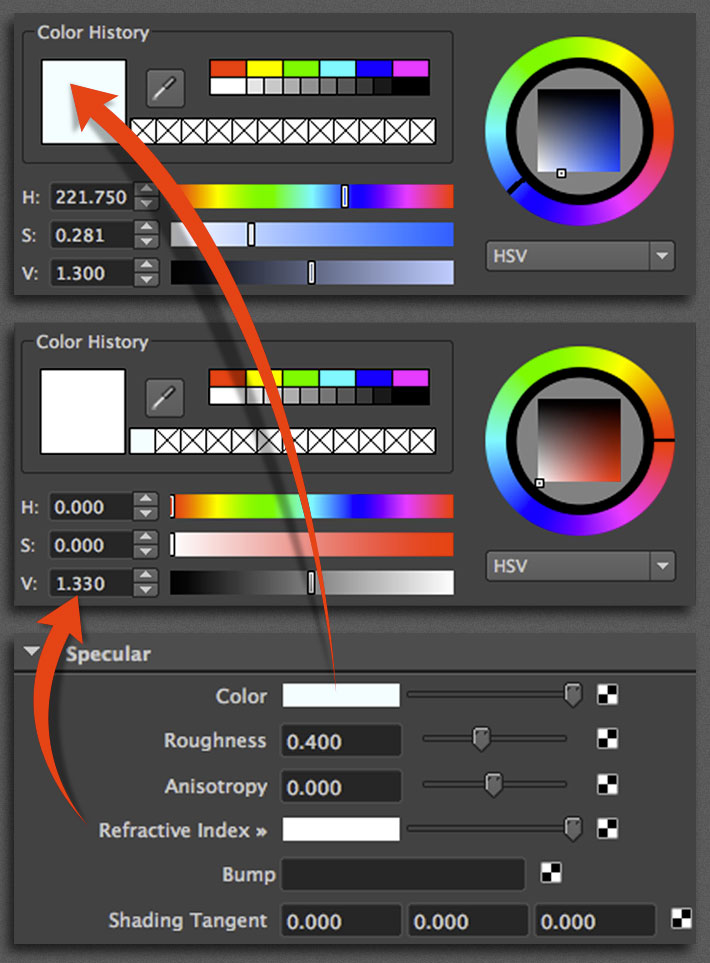
Here’s a test I did using the PxrLMSubsurface base material’s Specular Attribute. This was done without a texture-map, to see what the attribute could do in as a default, and I have to say that the out-of-the-box results are AMAZING! Check out the differences I got by just tweaking the Color and the the Refractive Index (image 2,) which I found on the Internet:
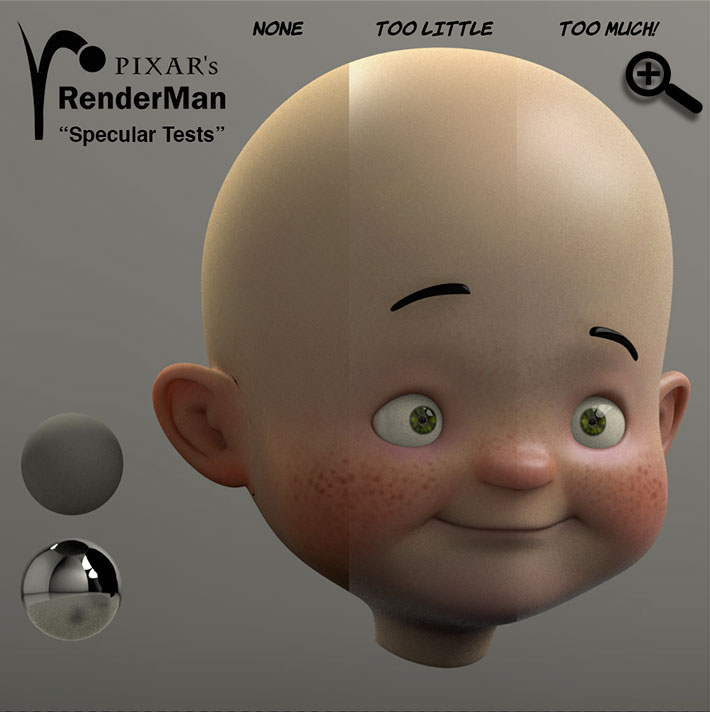
Here are the settings I used for the Color and Refractive Index:
Why use the Refraction Index of water? Well, babies are made of 78% water and as we get older we loose that percentage - 60% for a full-grown male!

This has to do with the Specularity of the skin, not the water-content. And because some parts are more “oily” than others, the next step is to create a custom texture map for the specular and input it in the color Attribute.
Hope this helps someone!
Cheer!

Here are the settings I used for the Color and Refractive Index:
Why use the Refraction Index of water? Well, babies are made of 78% water and as we get older we loose that percentage - 60% for a full-grown male!
This has to do with the Specularity of the skin, not the water-content. And because some parts are more “oily” than others, the next step is to create a custom texture map for the specular and input it in the color Attribute.
Hope this helps someone!
Cheer!
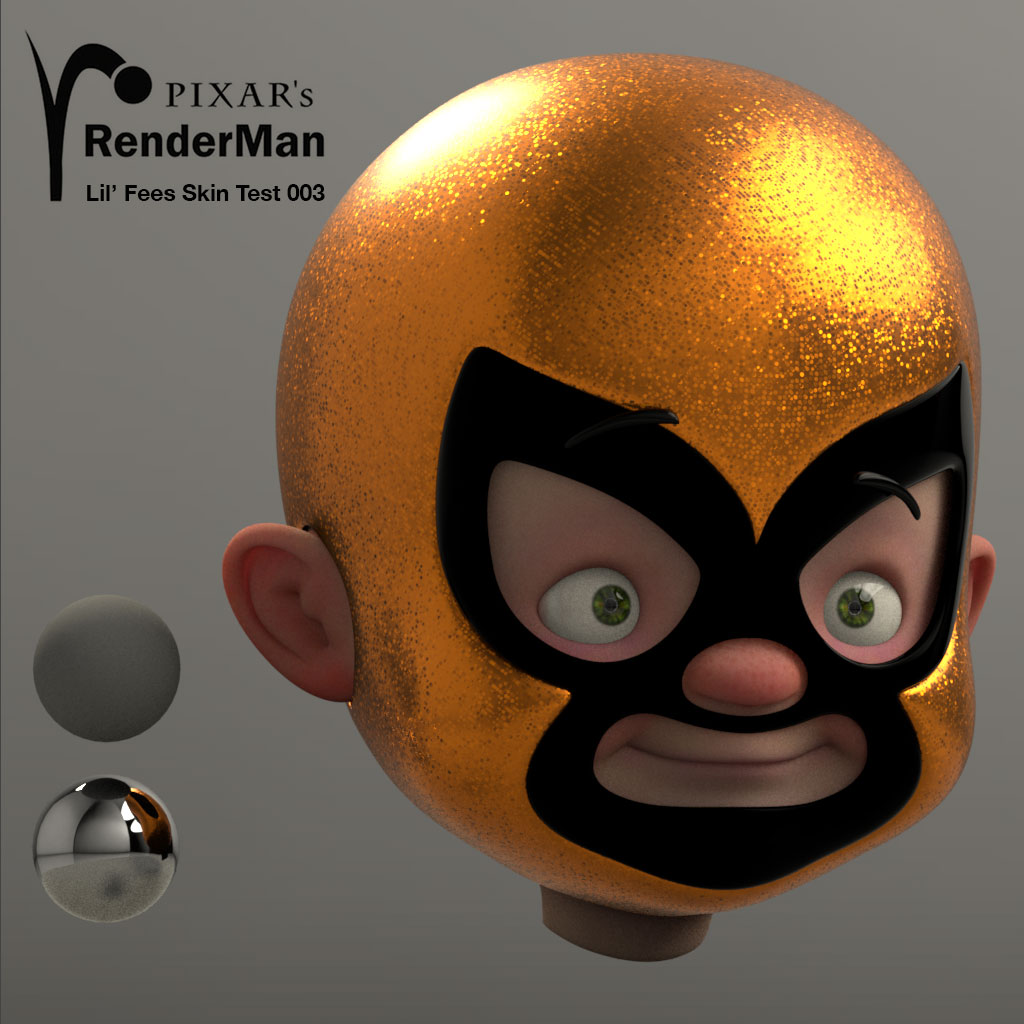
Another Round Of RenderMan Testing: PxrDisney Material
Monday, May 11, 2015 Filed in: Tools for Artists
More testing using Pixar’s RenderMan’s PxrDisney Material, PxrFlakes and other fun attributes:
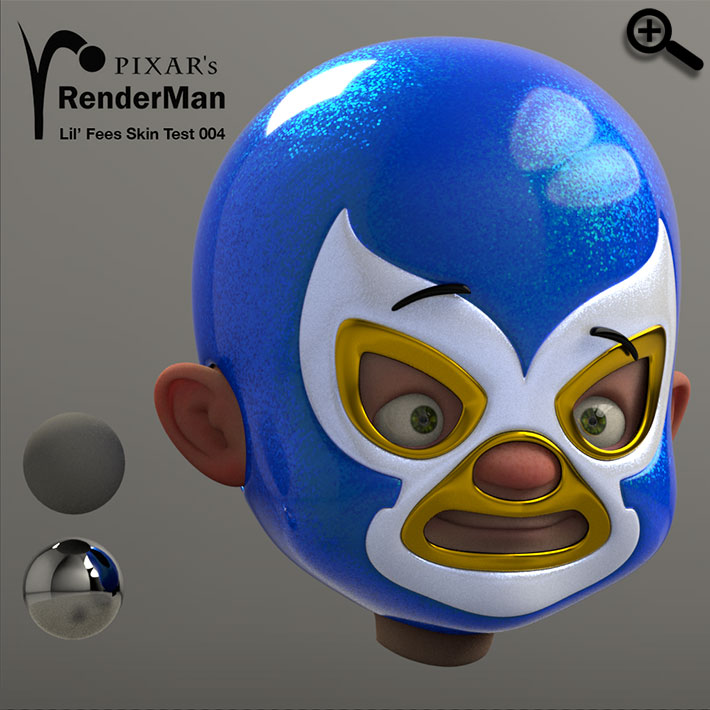
And another mask where I experimented with the PxrDisney Material.
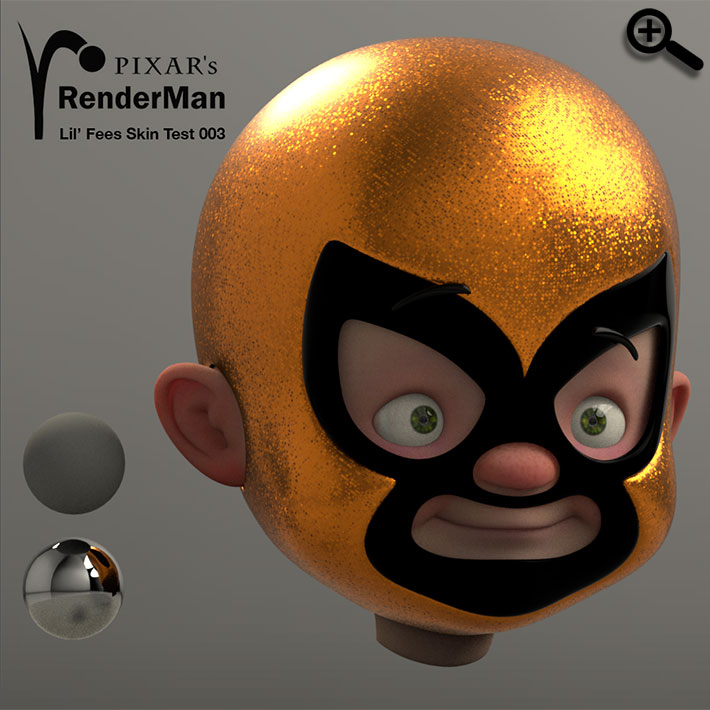
Cheers!
And another mask where I experimented with the PxrDisney Material.
Cheers!
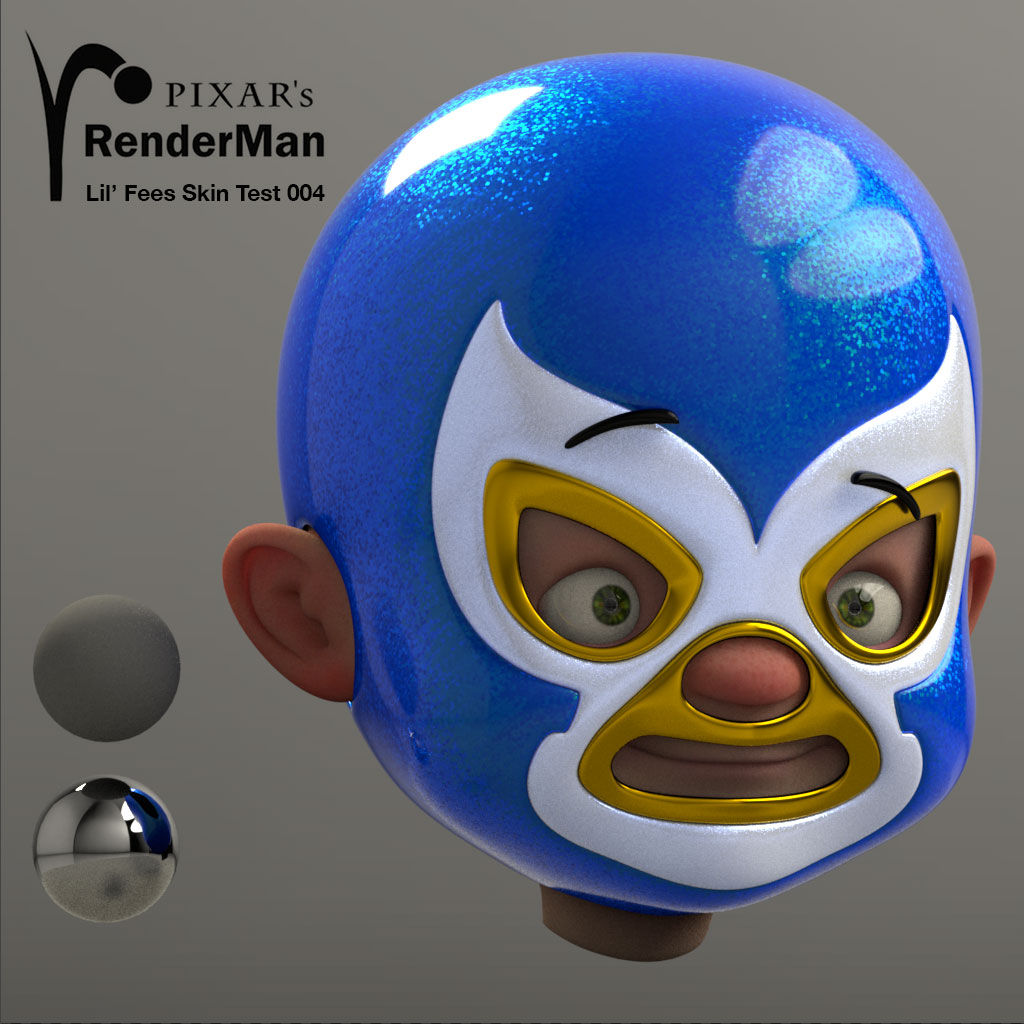
More RenderMan's Testing: Car Paint
Saturday, May 09, 2015 Filed in: Tools for Artists
More testing using Pixar’s RenderMan’s Car Paint and PxrFlakes plugin:
I played with the flake-size and the density to take the car paint to a pleather-level: fake, plastic-leather-like material used in 50s dinner-furniture, wrestling masks and stilettos!
For this one, I reduced all of the attributes of the PxrFlakes to make it different that the previous mask.
Cheers!

I played with the flake-size and the density to take the car paint to a pleather-level: fake, plastic-leather-like material used in 50s dinner-furniture, wrestling masks and stilettos!

For this one, I reduced all of the attributes of the PxrFlakes to make it different that the previous mask.
Cheers!
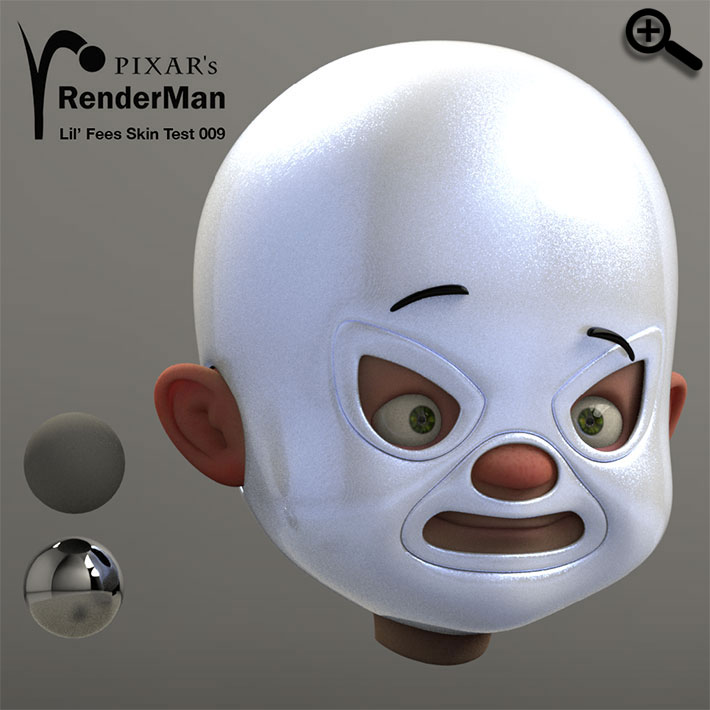
Testing Skin Texture With Pixar's RenderMan
Friday, May 08, 2015 Filed in: Tools for Artists
Yes, I just jumped on Pixar’s RenderMan’s bandwagon. It is AMAZING! Talk about an Artist’s friendly render-engine!
Here’s a test I did using the PxrLMSubsurface base material. I did the painting in Brush (Polypaint,) and then transferred it as a texture-file and applied it in Maya to a PxrLMDiffuse material. The sclera has a PxrLMGlass material. Check it out:

And here’s some tests using the Car Paint and the Rubber Presets:
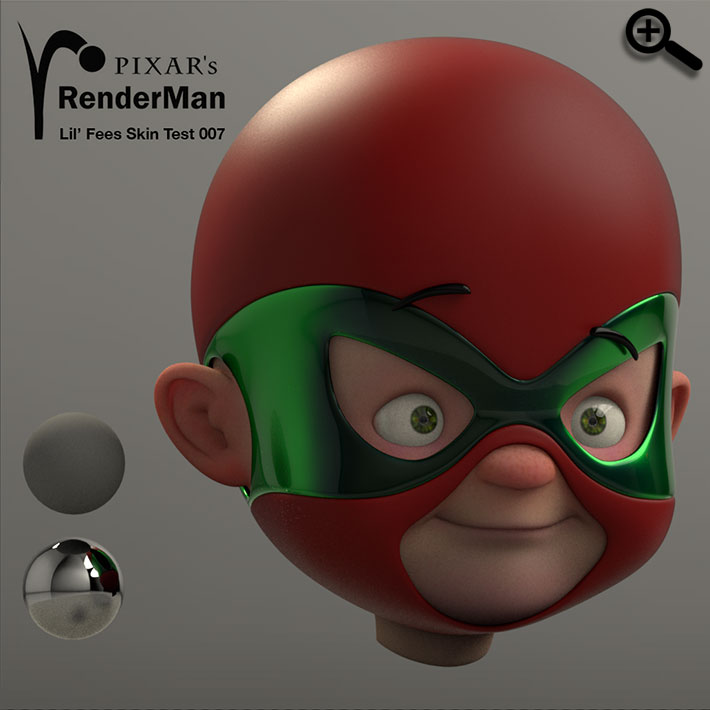
I’ll post more tests as I figure-out the fine-tuning!
Cheers!